
In this article, I will be showing you how to make a sturdy portable band saw stand for a harbor freight portable band saw, for just a few dollars, out of a 2 by 6, a couple of 2 by 4’s, and some bolts. All of the key information is laid out in written form below, but I will also have a video at the bottom of the page where you can see the building process for yourself. Hope you enjoy!
Tools And Materials
- 2, 4′ long 2 by 4 boards
- 1, 4′ long 2 by 6 board
- 15, 2.5″ Screws
- 2, 3/8 inch bolts
- Hand saw/miter saw/circular saw
- Hand drill
- Belt sander
- Impact driver (optional)
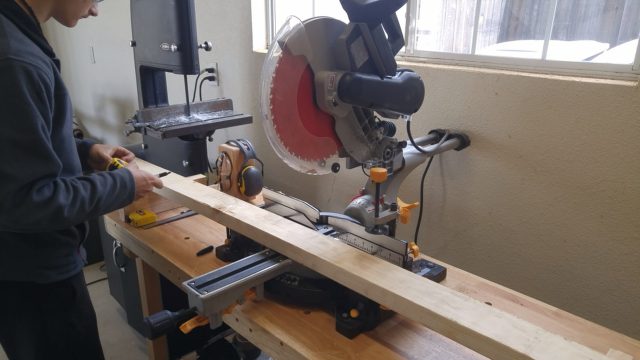
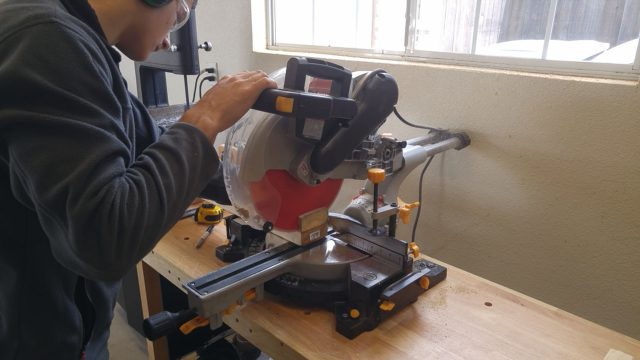
Cutting The Boards
Alright, to begin we are going to cut our boards down to 4 feet in length. We can do this with a hand saw, a circular saw or a miter saw as shown here. You need two, four foot 2 by 4 boards, and one, four foot 2 by 6 board.


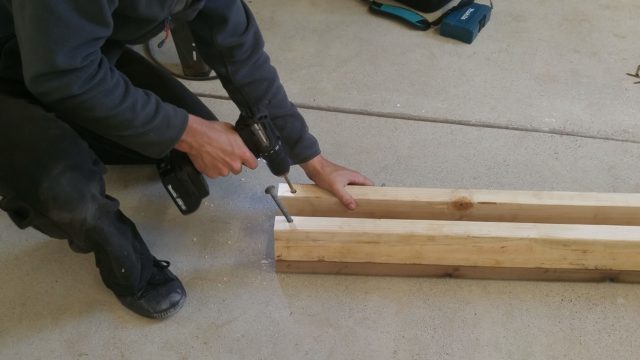
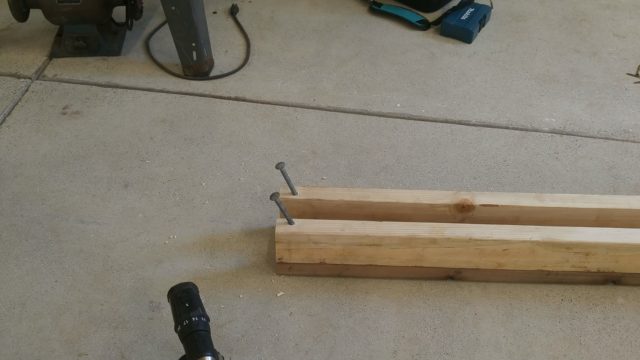
Screwing The Boards Together
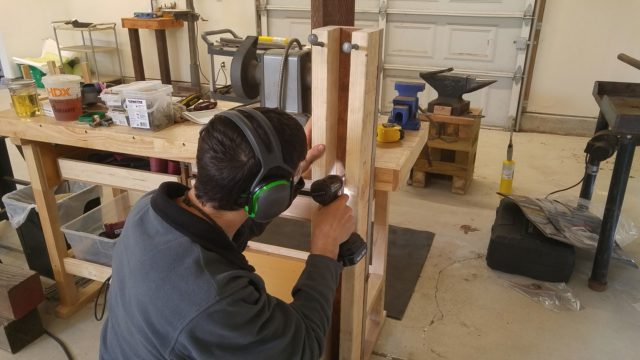
Next, we are going to lay the pieces out as shown, countersink some holes with a hand drill, and then screw the boards together using a hand drill or an impact driver. Two and a half inch screws work well for this, but longer ones should work fine as well.


Drilling Holes For The Bolts
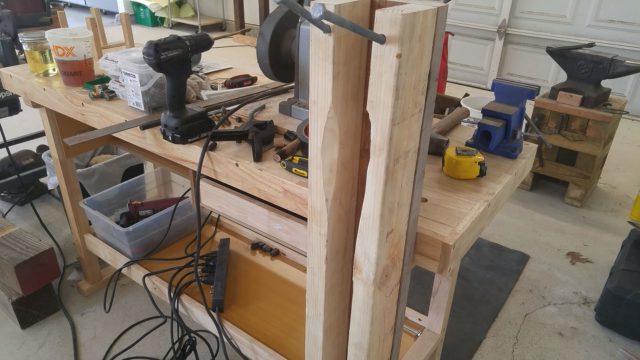
After that, we are going to take a 3/8 inch spade bit, and drill some angled holes into the top, inside edge of both 2 by 4 boards as shown. Then we are going to slide in our 3/8 inch bolts. This is what the saw will be hanging from. We want both of these holes to be the same depth so the bolts will stick out evenly, and we want them to stick out enough that the handle of the saw can rest on them easily.

Attaching The Stand To A Workbench
At this point, we are ready to attach the stand to a sturdy surface. This can be a wall or a workbench. In this case, I chose to attach it to my workbench. To do this, we can use the same two and a half inch screws from before.

Widening The Slot
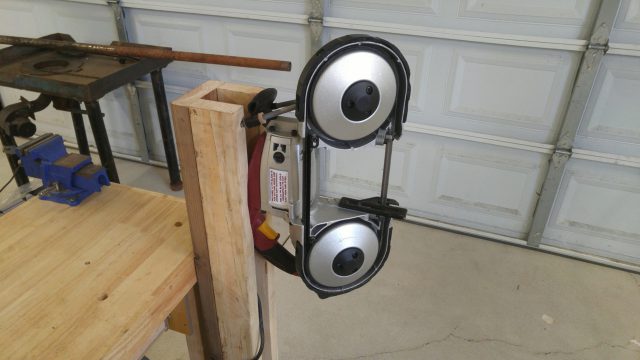
And finally, we are going to sand the inside edge of both 2 by 4 boards to widen the gap and allow the saw to fit tightly into the slot we created. To do this, a belt sander works great. The best way to do it is to simply start sanding and check it (by mounting the saw in place) periodically to see where you need to remove more material. I did it this way, and while it was time consuming, it produced a great fit.


Finished Stand
And with that, we have a finished stand! If you did everything right, it should lock in quite tightly and have very little movement or play.


Final Tips
Try adding some zip ties, or hose clamps around the top and bottom part of the handle, going around the back of the stand to make it even more stable.
Make a table for it! This can be out of wood or metal and is really simple to do. This is pretty much a must as the tiny metal table that comes with the saw is not very adequate for using it vertically. I will be doing an article and video on this shortly.
Triggering the saw is a little difficult, but I have found a large spring clamp works adequately as seen in the middle picture above. I am sure there are better trigger mechanisms out there, but it’s mostly worked fine for me, so I haven’t bothered looking for anything else.
Making A Harbor Freight Portable Band Saw Stand Build Video
Final Thoughts
Well, that is all I have for you today, I really hope you enjoyed! If you did, please subscribe to my newsletter below to get updates when new articles are posted.
Very soon I will be showing you guys how to make a solid steel table for this saw, as well as giving you a quick review of this saw after 1 year of use. So stay tuned for that!
Thanks for reading, have a great day, and God bless!
Joshua Waters
SharpshooterJD.com
.
Interesting. I would have never thought of mounting it this way. Very clever. Good enough detail that I could actually do it myself and I appreciate not always having to watch a video.
Thank you! Glad you found it helpful!
Nice post. I was checking constantly this blog and I’m inspired!
Very useful info particularly the remaining part ???? I deal with such info a Lot. I was looking for this particular info for a very lengthy time.
Thanks and good luck.
Thank you sir! Glad to hear you found it inspiring!
Take care.
Fantastic post however I was wondering if you could
write a litte more on this topic? I’d be very grateful if you
could elaborate a little bit further. Bless you!
Thank you so much! What more would you like to know? I’d be happy to help!
Excellent goods from you, man. I’ve consider your stuff previous to
and you’re simply too magnificent. I really like what you’ve acquired right here, really like what
you are stating and the way during which you say
it. You make it entertaining and you continue to care for to
stay it wise. I can not wait to learn much more from you.
This is really a tremendous web site.
Thank you so much for the kind words!
I cannot thank you enough for the post.Really looking forward to read more. Cool.
Thank you so much! Glad you are enjoying them :).
My followers on Google+ would want to read your entry. May I promote it to them?
You are welcome to share a link to this page.
Some truly quality blog posts on this web site , saved to my bookmarks .
Well done on the blog 🙂
fantastic post, very informative. I wonder why the other specialists of this sector do not notice this. You must continue your writing. I’m confident, you have a huge readers’ base already!
great job. thank you for the article
If you plan on doing a lot of resawing, pay close attention to the specifications of band saws you are considering for purchase, in light of what has been said above. If resawing doesn’t look like it will play a large part in your future, then you are probably more interested in cutting curves in thinner material. In this case, throat depth of your band saw becomes a very important consideration because, on a small band saw, you will be constantly bumping into the back of the throat and you may not be able to complete the curved cuts you have penciled out.
This is very true. For me, I use my bandsaw primarily to cut metal stock to length. So the throat depth is almost never an issue for me. I can even cut out my 6″ metal bowls on it without issue. Also, most larger portable bandsaws these days are “deep cut” saws anyway and have a fairly large throat depth. But it would definitely be a consideration for some users.
Really appreciate your effort. For any new or beginner woodworking, this piece of content will come in handy. Along with all the tips, I would prefer to add some safety tips along with it. Before proceeding with any project, a clear idea in mind will help a lot. Anyways thanks for your heads up and writing this all stuff in one piece.
Thanks for the kind words! Appreciate the comment!
Hi! Someone in my Facebook group shared this site with
us so I came to give it a look. I’m definitely enjoying the information.
I’m bookmarking and will be tweeting this to my
followers! Terrific blog and amazing design.
Thanks, will subscribe to news 🙂 !
Appreciate it!
Very useful tips. I’ll apply your tips for making a harbor freight bandsaw for me. Hopefully, I made it successfully.
Thanks for sharing amazing tips for us.
Glad you found them useful! You are very welcome. Thanks for the kind words! Good luck to you!